

How to Prepare for a Fast Home Sale: Timeline, Costs & Seller Options
The fastest part of a home sale is the part you do before anyone makes an offer. Sellers who go to market with their paperwork in one folder, their payoff request already in, and their questions written down tend to move through the same steps more calmly than sellers who hunt for the deed while a buyer waits. If you want to know how to prepare for a fast home sale, the answer is less about staging and more about readiness: documents, decisions, and a short list of people to call.
To prepare for a fast home sale, build a seller readiness packet before you ask for offers: proof of ownership and authority to sign, a written mortgage payoff request, property tax and association records, disclosure forms, permit and repair history, and keys and access details. Add low-cost cleanup, line up a closing office or attorney, and decide your priorities. Most of it takes about a week.
That sounds like a lot of paper, and it is. But nearly every item on the list exists because its absence has stalled a real transaction somewhere: a closing office waiting on a lender’s payoff figure, a buyer’s agent asking for an association document that takes ten business days to produce, a title search that turns up a name mismatch nobody noticed. Preparation does not make a sale fast by itself. It removes the delays that are entirely within your control, so that the delays you can’t control are the only ones left.
Preparation also changes your bargaining position, in a quiet way. A seller who can produce a payoff figure, a clean ownership record, and a clear list of known issues can compare offers on net proceeds without scrambling, and can tell the difference between a buyer’s genuine requirement and a stalling tactic. A seller who is still collecting paperwork tends to accept whichever offer arrives first, because the clock feels louder than the numbers.
This article treats preparation as a project with a beginning, a middle, and an end. It starts by defining what “ready” means and how much preparation your timeline can support, then lays out a seven-day sprint you can follow day by day. After that, it walks through the document checklist with where to find each item, the property facts and disclosures buyers will ask about, and the practical question of what to fix, what to skip, and what to do yourself versus hire out. It also covers choosing a closing partner before you need one, how to share your packet safely, which documents expire, and the questions to ask before you commit to any sale route.
Along the way you’ll find worked examples with hypothetical numbers, a decision table matching preparation level to deadline, and a list of common mistakes. If you’re comparing the whole menu of ways to sell, the overview of selling a house fast maps the routes. If your sale has already stalled, what slows down a home sale helps you diagnose the cause. For the step-by-step order of the sale itself, see the fast-sale playbook. This guide covers the preparation that comes before all of it.
One expectation to set up front: preparation reduces risk but does not eliminate it. A well-organized seller can still run into a buyer who falls through, a lien nobody knew about, or a county office with a backlog. Think of the packet as insurance against the avoidable problems, not a promise about the unavoidable ones. And nothing here is a claim about how any particular buyer, company, or closing office will perform; those details have to be confirmed in writing for your transaction.
What “Ready” Means Before You Ask for Offers
Readiness is not perfection. It’s a state in which you can answer the questions a buyer, a closing office, or a lender is most likely to ask, within a day, with documents in hand. Defining it clearly helps you stop when you’re done instead of polishing forever.
Why preparation shortens the part of the sale you control
Where unprepared sellers lose days
Delays from missing documents are rarely dramatic. They arrive in small pieces: a day to find the mortgage statement, two days waiting on a servicer to answer a payoff request, another few days because the person on the deed isn’t the person who answers the phone. Each piece seems minor, and together they can consume a week or more of a contract period that was supposed to be short.
The costliest version of this is the request that has a built-in waiting period. A mortgage servicer may take several business days to deliver a payoff statement. An association may take about two weeks to produce its documents under some state laws. A county office may need a few days to return a certified copy of a deed. If those requests start after a contract is signed, they sit on the critical path. If they start before you list, they run in the background while you do everything else.
Illustrative example (hypothetical numbers, not market data): A seller signs a contract on a Monday with a closing set for 21 days later. She then spends two days locating her deed, sends a payoff request on Wednesday, learns on Friday that her servicer needs several business days to respond, and discovers the following week that the association will take about two weeks to produce its documents. None of those steps was hard. But because they began after the contract, their waiting periods stacked at the front of a short schedule and left her with almost no margin for the surprises that came later.
Preparation also pays off when something does go wrong. A seller who already knows the status of every lien, every owner, and every open permit can respond to a title surprise in an afternoon. One who is learning those facts for the first time must research and react at once. The companion article on a 14-day sale shows how little slack a short schedule has for either.
The readiness packet: one folder, four sections
The simplest way to stay organized is to keep everything in one folder, paper or digital, divided into four sections. The first covers ownership and authority: the deed, any trust or estate paperwork, identification for every signer, and proof of marital status where it affects title. The second is money: mortgage statements, the written payoff request and response, property tax bills, special assessments, association dues, and any liens you know about.
The third section is property facts: seller disclosure forms, permits and inspection reports, repair and maintenance records, warranties, insurance claim history, and utility information. The fourth is logistics: keys, garage and gate codes, alarm details, a list of what stays and what goes, move-out plans, and contact details for the closing office or attorney you’ve chosen.
Digital copies matter. A scanned or photographed copy of every document, saved in a folder you can share quickly with a closing office, saves hours when someone asks for the third page of a lease or a copy of last year’s tax bill. Name the files plainly, such as “deed-recorded” or “payoff-request-sent,” so you can find them under pressure. The document checklist later in this guide lists every item and where each one comes from.
Deciding how much preparation your timeline allows
Preparation levels: minimal, standard, and full
How much to prepare depends on how much time you have and how much risk you can tolerate. A seller facing a hard deadline in two weeks cannot do the same preparation as one with two months. The table below sketches three levels, from the bare minimum to the full version.
| Level | What it includes | Rough effort | Best when |
|---|---|---|---|
| Minimal | Deed, authority to sign, payoff request, tax bill, access details | One to two days | A hard deadline and a clean, simple property |
| Standard | Minimal items plus disclosure draft, permits and repair records, association documents, cleanup, closing partner chosen | About a week | A short but not frantic timeline |
| Full | Standard items plus pre-listing inspection, minor repairs, professional photos, tax consultation | Two to four weeks | Flexible dates and a goal of the strongest possible net |
Treat the levels as a menu, not a ladder. Many sellers do the minimal tier on the legal and financial side and the standard tier on the cleanup, and that mix is often exactly right.
What not to prepare: effort that rarely pays on a short timeline
Knowing what to skip is as useful as knowing what to do. Major renovations such as a new kitchen or flooring throughout rarely return their cost on a short timeline, and they take weeks of contractor time you may not have. Elaborate staging is a poor use of a week when the real constraint is paperwork. Chasing perfect curb appeal makes sense for a retail listing, less so for a buyer who plans to renovate anyway.
The same goes for gathering documents that nobody will ask for. Decades of utility bills, every appliance manual, and years of receipts for minor purchases add clutter without helping a buyer or closing office. Focus on documents that prove ownership, show money owed, describe known defects, or answer predictable questions.
Finally, avoid preparing around an assumption you haven’t tested. If you assume a buyer will want a pre-listing inspection report and pay for one, you may find that the buyer orders their own anyway. If you assume the roof needs replacing and spend thousands, a buyer who planned a renovation may have priced the roof into the offer already. A short conversation with an agent, an attorney, or a prospective buyer about what actually matters can prevent costly guesswork. The repair-or-sell-as-is guide works through that decision in depth.
A Seven-Day Prep Sprint, Day by Day
A week is enough to assemble most of a readiness packet if you front-load the items that involve waiting. The schedule below puts every request that someone else must answer in the first three days, so their turnaround overlaps with your own work. Adjust the days to fit your life, but keep the order: waiting tasks first, doing tasks second.
| Day | Focus | Key tasks | What you should have by evening |
|---|---|---|---|
| 1 | Ownership and payoff | Locate the deed; list every owner; send a written payoff request | Copy of deed; dated payoff request on file |
| 2 | Authority and title | Confirm who can sign; gather trust or estate papers; ask a closing office about a preliminary title search | Signer list; title search requested |
| 3 | Taxes, association, utilities | Get the tax bill and assessments; request association documents; list utility accounts | Tax bill; association request confirmation |
| 4 | Property records and disclosure | Collect permits, warranties, repair and insurance-claim records; draft the disclosure form | Records folder; disclosure draft |
| 5 | Condition triage | Walk the house room by room; sort items into fix, credit, or disclose | Written triage list with rough costs |
| 6 | Presentation and access | Clean and declutter; do inexpensive fixes; take photos and video; set up keys and access | Photo set; keys and codes list |
| 7 | Partners and routes | Choose a closing office or attorney; write your questions; compare routes on net proceeds | Closing partner chosen; route comparison started |
The table is a map, not a mandate. If you have a lien to resolve or a probate case in progress, days one and two may stretch into a week by themselves, and that is a good reason to start early.
Days 1 through 4: paper first
Days 1–2: ownership, authority, and the payoff request
Start with the deed, because everything else depends on it. If you can’t find your copy, the county office that records deeds, usually called the recorder, register of deeds, or county clerk depending on the state, can provide one. Many offices offer online search of recorded documents; the Maricopa County Recorder in Arizona, for example, runs a recorded document search on its official website. Your own county’s office may use a different name and process, so check its website or call.
Write down every owner shown on the deed and ask whether each can sign. Note any name differences between the deed and current identification, because small mismatches such as a missing middle initial or a maiden name can require an affidavit. If a trust, estate, or business entity owns the property, gather the documents that prove who can sign for it.
Then send a written payoff request to your mortgage servicer, and to any second lender or home equity line. The request is free, and the servicer’s clock starts when it is received: for most home loans, federal regulation requires a payoff statement within a reasonable time and no more than seven business days after a written request, per 12 CFR 1026.36(c)(3). Keep a dated copy of what you sent and how you sent it. A payoff statement is a snapshot with a good-through date, so you’ll update it before closing; getting the first one now gives you a real number for planning.
Days 3–4: taxes, liens, association documents, and the disclosure draft
On day three, collect the paperwork that shows what the property owes. The most recent property tax bill and any special assessments come from the county or city. Many counties let owners look up bills online. The Cook County Treasurer in Illinois, for example, lets owners check payment status and request a copy of a tax bill on its website, and the Cook County Assessor’s property search shows property details by address or parcel number. If your county has similar tools, they’re the quickest way to confirm parcel numbers and what’s owed.
If there is a homeowners or condo association, request its documents now. State rules differ, but the waits can be long: Florida requires a condominium association to issue an estoppel certificate within 10 business days of a written or electronic request, per Florida Statutes section 718.116(8), and Texas requires a property owners’ association to deliver the required information no later than the 10th business day after a written request under Texas Property Code chapter 207.
On day four, begin drafting your disclosure form and gathering property records. Writing the draft early matters because it forces you to remember what you know: past leaks, repairs, insurance claims, pest treatments, additions. The details of what the form asks for vary by state, as the next sections explain, and a draft in hand lets an attorney or agent review it without delay.
Days 5 through 7: property, partners, and decisions
Days 5–6: condition triage, photographs, and access
With the paper requests in motion, turn to the house. On day five, walk every room with a notepad or phone and list what you see: leaks, cracked windows, sticking doors, stained ceilings, broken appliances, old smells, deferred outdoor work. Then sort each item into one of three groups: fix it cheaply, offer a credit or price adjustment, or disclose and leave it. The point of the exercise is not to fix everything. It is to avoid being surprised by what a buyer’s inspector will find, and to decide in advance how you’ll respond.
Day six is for the cleaning, decluttering, and minor repairs that change first impressions, along with photographs and video. Most buyers, whether retail or investor, look at pictures before they decide whether to visit. Natural light, clean surfaces, and open rooms help any buyer. If the house is vacant, take dated photographs of the condition for your own records as well.
Safety comes first in any walkthrough. If the house has been vacant, has storm or water damage, or has areas you suspect are structurally unsound, don’t enter unsafe spaces just to take photographs, and ask a qualified professional to look first. If there are hazards such as exposed wiring or rotted flooring, note them for disclosure and cordon them off where you can. The damaged house guide covers documentation when damage is significant, including insurance claim interplay.
Also set up access. Decide where keys and codes will be, who can show the house, how much notice you’ll need, and what hours work. Call your insurance company to ask what happens to coverage if the house is empty during the sale. The guide to selling a home fast while living in it covers routines for occupied homes, and the vacant house guide covers the opposite situation.
Day 7: choose a closing partner and compare routes on paper
The final day of the sprint is for decisions. Choose the closing office or attorney you want to work with, and contact them to confirm they can handle your timeline. Write down your questions for buyers and for the closing partner, using the lists later in this guide. Then compare your options on paper: what you expect from a listing with an agent, a sale to a cash buyer, and any other route that fits your situation, using net proceeds rather than headline price.
Part of that comparison is price evidence. Ask a real estate agent for a comparative market analysis, which uses recent closed sales of similar nearby homes, or review the closed sales yourself. Asking prices of other active listings show the competition but not what buyers have actually paid. If you plan to ask cash buyers for offers, remember that they usually begin with a similar view of value and then subtract repairs, holding costs, financing costs, and a margin for risk, so a range of closed sales gives you a yardstick for judging whether an offer’s logic makes sense. Methods vary by buyer, and any single formula should be treated as illustrative.
The comparison does not need to be precise yet. You are building a framework with placeholders: expected sale price range, commission or discount, repair costs, holding costs, and payoff. The net proceeds calculator and the guide to seller closing costs help fill in the pieces. As offers arrive, you replace placeholders with real numbers.
By the end of day seven you should have a packet that a closing office or buyer could review in an afternoon, a list of outstanding requests with dates, and a rough sense of your priorities. If the sprint exposed a serious issue, such as an unexpected lien or an owner who can’t be located, you’ve found it with time to act, which is the point of the whole exercise.
The first graphic maps the sprint as a six-stage process, from ownership and payoff through the decision on day seven. All of the details are in the table and text above, and the picture works as a quick reminder you can keep beside your own checklist.
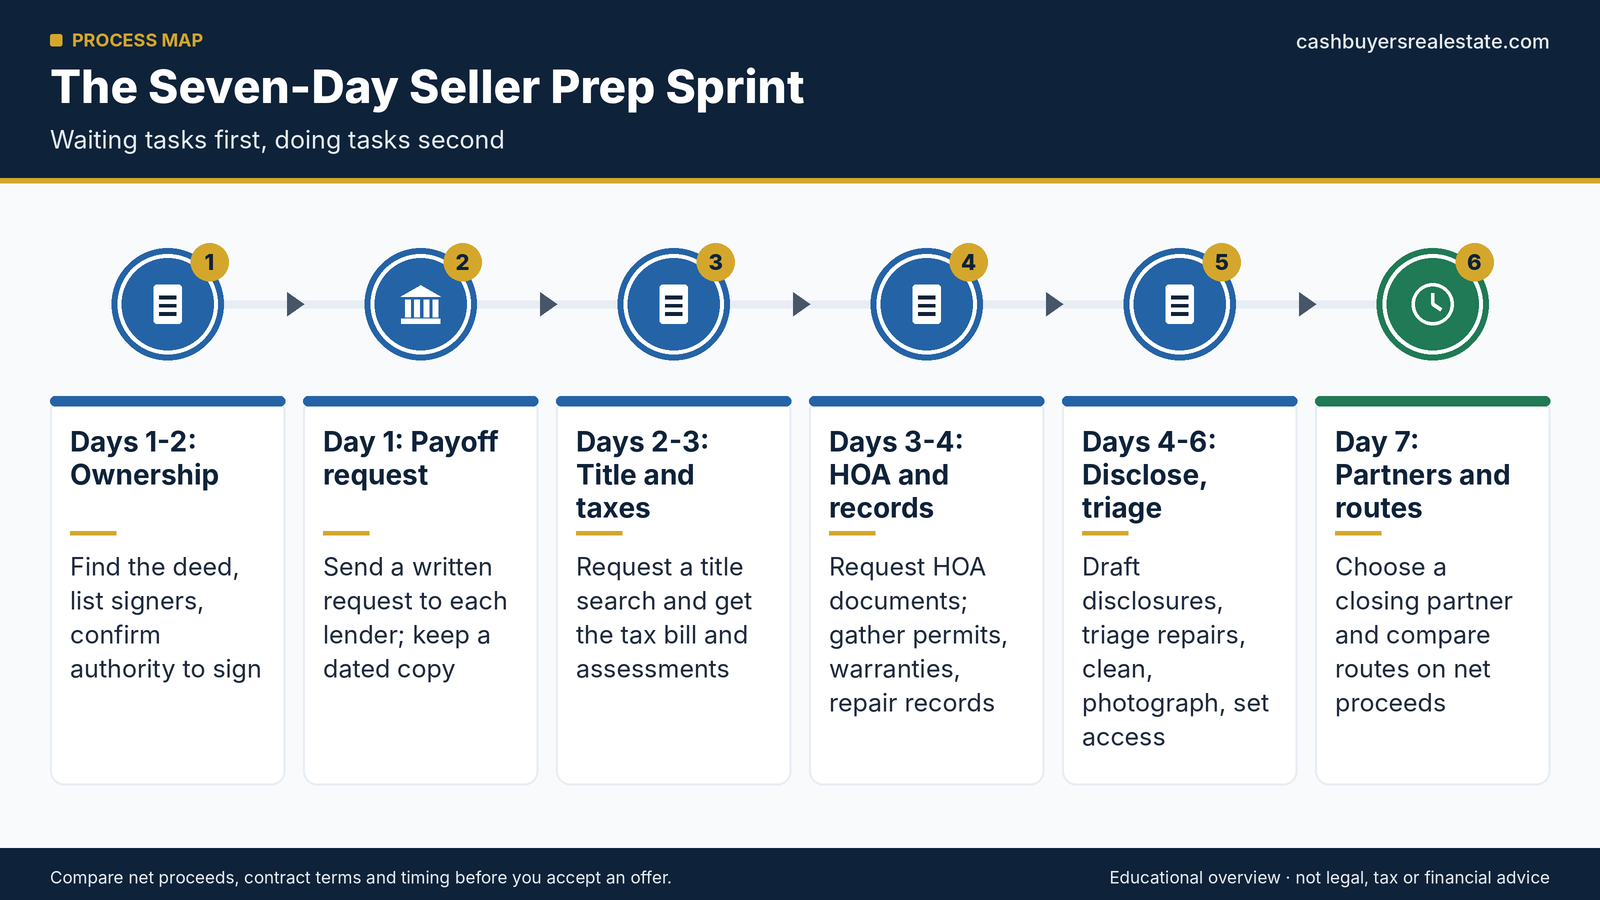
Text version of this infographic
- Days 1-2: Ownership — Find the deed, list signers, confirm authority to sign
- Day 1: Payoff request — Send a written request to each lender; keep a dated copy
- Days 2-3: Title and taxes — Request a title search and get the tax bill and assessments
- Days 3-4: HOA and records — Request HOA documents; gather permits, warranties, repair records
- Days 4-6: Disclose, triage — Draft disclosures, triage repairs, clean, photograph, set access
- Day 7: Partners and routes — Choose a closing partner and compare routes on net proceeds
The Document Checklist: Ownership, Money, and Property Records
This is the heart of the readiness packet. The checklist below lists the documents most sellers need, why a buyer or closing office wants each one, where to get it, and how much effort it usually takes. You may not need every row, but scanning it is a quick way to catch the item you forgot.
| Document | Why it is needed | Where to get it | Effort |
|---|---|---|---|
| Recorded deed | Proves ownership and how title is held | County recorder, register of deeds, or clerk | Low to medium |
| Photo ID for every signer | Closing office verifies identity | Your own records | Low |
| Trust certificate, letters of authority, or entity documents | Shows who can sign for a trust, estate, or business | Trustee, court, or attorney; state business registry | Medium to high |
| Mortgage statement and written payoff request | Establishes the payoff and who gets paid at closing | Your servicer | Low (but up to seven business days to respond) |
| HELOC or second-lien information | Each lien needs a payoff | Lender statements; title search | Low to medium |
| Property tax bill and special assessments | Taxes are prorated; unpaid amounts are paid at closing | County or city treasurer or tax collector | Low |
| HOA or condo documents and dues statement | Buyers receive these; unpaid amounts are settled | Association or its manager | Medium (often about ten business days) |
| Seller disclosure form | Required in many states; informs the buyer | State or local forms; agent or attorney | Medium |
| Lead-based paint disclosure (pre-1978 homes) | Federal requirement for most older housing | Contract addendum; EPA pamphlet | Low |
| Permits and inspection reports | Shows work was approved; flags gaps | City or county building department; your files | Medium |
| Warranties, repair invoices, and insurance claim records | Answers buyer questions; supports disclosures | Your records; contractors; insurer | Low to medium |
| Survey or plat | Shows boundaries; may be required for title insurance | Your closing records; surveyor; county | Low to high |
| Lease and rent roll (if tenants) | Buyers need to see terms and rent status | Your landlord files | Low |
| Utility accounts and keys/codes list | Smooth handoff at closing | Your accounts and records | Low |
Use the “effort” column to schedule. Anything marked medium or high, or anything that depends on another party, belongs at the top of your list.
Ownership, authority, and the money trail
Deed, vesting, and who can sign
The deed shows who owns the property and in what form, which is called vesting. Owners can hold title as sole owners, as joint tenants, as tenants in common, as spouses with specific rights, or through a trust or entity. How title is held affects who must sign, what happens if an owner has died, and what a buyer’s title insurer will require. If the vesting is unclear, a closing office or attorney can read it for you in minutes, and that is a good use of a short call.
Marital status matters in some states. Rules on spousal consent or signatures can apply even when only one spouse is on the deed, and they vary widely. If you are married, ask an attorney or the closing office whether your spouse must sign. If a divorce is underway, the divorce guide addresses court orders and who must agree.
For inherited property, authority usually comes from a court, a trustee, or a transfer document, not from being named in a will or being a family member. Gather letters of authority, trust certificates, or death certificates as applicable, and talk with an attorney before you list. The inherited house guide and the probate hub cover the paths.
Mortgage payoff, taxes, and lien checks
The payoff request you sent on day one produces the number that matters most to your net proceeds. Read the statement carefully. It should show the total needed to pay off the loan on a stated date, a daily interest amount for later dates, any fees, and where to send funds. If you have an escrow account for taxes and insurance, the servicer typically refunds any balance after payoff, but that refund arrives separately from your closing proceeds. The guide to selling fast with a mortgage walks through the details.
Tax records tell you what’s owed and when. Unpaid property taxes are paid from proceeds at closing, and past-due amounts can bring penalties and interest. Special assessments for things like streets or sewers sometimes appear as separate line items. Confirm the parcel number on the bill matches your deed, since errors there can trigger a title question.
Liens are the hardest category to prepare for, because you may not know about them. A preliminary title search by a closing office or title company reveals recorded liens, judgments, and mortgages you might have forgotten. If you know of a specific lien, such as an old contractor dispute, a tax lien, or a judgment, start gathering payoff information now. The liens guide explains each type, and the hub on title problems covers fixes.
Property facts, disclosures, and association documents
Seller disclosure forms: a Texas example and why states differ
In many states the law requires sellers to complete a written disclosure about the property’s condition, and the content, timing, and exemptions vary. Texas is a useful example because its statute is specific. Under Texas Property Code section 5.008, a seller of residential property with no more than one dwelling unit must give the purchaser a written seller’s disclosure notice, and must deliver it on or before the effective date of a binding contract; if the seller doesn’t, the purchaser may terminate within seven days after receiving the notice. The form asks about the seller’s knowledge of the property’s condition, including systems, known defects, flooding, unpermitted alterations, and association fees, and the seller completes it to the best of the seller’s belief and knowledge.
The same statute lists exemptions, including certain transfers by fiduciaries administering an estate or trust, transfers under court order or foreclosure, and transfers between co-owners, spouses, or lineal relatives. Other states set different rules, and some take a different approach altogether. Because of that variation, ask a local agent, attorney, or your state’s real estate regulator which form applies to you.
Whatever your state requires, complete the form honestly. Never conceal a known material defect, and don’t skip a required form to save time. An honest disclosure protects you from later claims and often speeds a sale by removing the fear of the unknown. The as-is guide explains why selling as-is doesn’t cancel disclosure duties.
Lead-based paint, permits, warranties, and association documents
Federal law adds one disclosure that applies across states. Under the Environmental Protection Agency’s rule, sellers of most housing built before 1978 must give buyers the “Protect Your Family From Lead In Your Home” pamphlet, disclose any known lead-based paint and hazards, include a Lead Warning Statement in the contract, and allow a 10-day period for buyers to arrange a lead inspection or risk assessment, which the parties may change in writing or the buyer may waive, according to the EPA’s real estate disclosure page. If your home was built before 1978, include this in your packet.
Permits and warranties answer common buyer questions. A buyer who sees a finished basement or a new deck will ask whether it was permitted. Your city or county building department can tell you what is on file, and an old contractor may have copies of invoices. If you find unpermitted work, talk with an attorney or agent about how to handle disclosure, since rules differ and ignoring the issue rarely helps.
For association-governed properties, the package of documents can include rules, budgets, insurance details, and a statement of dues and any unpaid amounts. In Florida a condominium estoppel certificate delivered by hand or electronically is effective for 30 days, and in Texas the resale certificate must have been prepared within 60 days before delivery, so timing your request matters: too early and it may expire, too late and it may hold up closing. Ask the association or your closing office how long the documents stay valid in your state.
Condition Triage, DIY Versus Pro, and the Prep Budget
Paperwork is half of readiness. The other half is the house itself, and here the temptation is to either do too much or nothing at all. The goal is a short, ranked list of what is worth doing before you ask for offers, who should do it, and what it should cost. Everything on that list should either remove a real obstacle or cost less than the discount a buyer would apply for leaving it alone.
Deciding what to fix, skip, or disclose
Cheap fixes and cleanup that change first impressions
The best return on a short timeline usually comes from work that costs little and shows up in photographs and the first thirty seconds inside the door. A deep clean, including kitchens, bathrooms, windows, and floors, is the baseline. Removing excess furniture and personal items makes rooms look larger. Fresh paint in a few worn spots, tightened hardware, working light fixtures, and a tidy yard remove small signals of neglect that make buyers wonder what else has been neglected.
Leaks and moisture deserve special attention. A dripping faucet is a cheap fix. A stained ceiling is a question mark that buyers and inspectors will want answered, and painting over it without addressing the cause is a mistake: it can look like concealment, and it may violate disclosure rules. Fix the source if you can, document the repair, and disclose the history as your state requires.
Resist the urge to upgrade. New countertops or flooring rarely pay back on a timeline measured in days, and buyers who plan to renovate often prefer to choose their own finishes. The distinction to keep in mind is repair versus improvement: repairs remove objections, improvements add taste. For homes that need more than light work, the fixer-upper guide and damaged house guide cover who buys them and how they value the repairs.
Pre-listing inspection: pros and cons
A pre-listing inspection is a general home inspection that you order before you go to market. It produces a report much like the one a buyer’s inspector would write. Some sellers swear by it, and others consider it a waste. The honest answer is that it helps in some situations and not in others, which the table below lays out.
| Consideration | In favor | Against |
|---|---|---|
| Surprises | You learn about problems before a buyer’s inspector does | You may learn about problems you can’t afford to fix |
| Pricing | A realistic price reflects known condition | A long findings list can anchor you to a lower number |
| Negotiation | Fewer late-stage repair requests, since issues are known | Buyers often order their own inspection anyway |
| Disclosure | The report supports accurate, documented disclosures | Known issues may need to be disclosed under your state’s rules |
| Cost and time | Quotes for repairs can be gathered in advance | Report fees and scheduling add cost and days |
| Buyer trust | Some buyers value a seller-provided report | Some buyers or lenders discount a report they didn’t order |
Scope is worth understanding before you hire anyone. A general inspection is a visual review of accessible areas and major systems. It typically does not include specialty work, such as sewer line cameras, radon testing, or wood-destroying insect inspections, which are usually ordered separately and priced separately. If you know your house has a particular concern, such as an old sewer line or a history of moisture, ask the inspector or a specialist whether a targeted test makes sense. Reading the contract for the inspection itself also helps: know what is covered, how long the report takes, and whether the inspector will talk through findings with you by phone.
The pattern is that a pre-listing inspection works best for older homes, homes with visible wear, and sellers who want to price confidently and avoid renegotiation. It’s less useful when a buyer plans a renovation or a flat investor-style purchase where the buyer inspects on their own terms. If you do order one, choose a licensed inspector where your state licenses them, attend the walkthrough, and read the whole report, not only the summary.
Who does the work and what it costs
DIY versus professional tasks
Doing the work yourself saves money, and sometimes it is the right choice. Other times, it creates safety risks, code problems, or a repair that fails inspection and has to be redone. The table below sorts common preparation tasks by who should usually handle them. It is general guidance, not a replacement for judgment about your skills and local rules.
| Task | Usually DIY | Usually a professional | Why |
|---|---|---|---|
| Decluttering and packing | Yes | Optional organizers or movers | Low risk; mainly time |
| Deep cleaning | Yes, if time allows | Cleaning service for speed | Time versus cost |
| Paint touch-ups and minor patching | Yes | Painter for whole rooms | Skill and speed |
| Replacing bulbs, hardware, caulk | Yes | Handyman for a long list | Simple but numerous |
| Electrical, gas, and major plumbing | No | Licensed contractor | Safety, code, and permit rules |
| Roof, foundation, mold, and structural issues | No | Specialist and a written estimate | High cost, high risk |
| Photos and video | Phone is often enough | Photographer for premium listings | Quality of first impressions |
| Payoff request and document gathering | Yes | Agent or attorney for help | Straightforward but time-sensitive |
| Title search and lien review | No | Title company or attorney | Needs record access and expertise |
| Disclosure form review | Draft yourself | Agent or attorney review | Legal consequences of inaccuracy |
| Tax estimate on the sale | Rough idea only | Tax professional | Rules vary with facts and state |
One rule cuts across the table: keep receipts and invoices for any work. They support your disclosure and, in some cases, your tax records.
A prep budget with hypothetical numbers
Budget before you spend, because small expenses add up quickly and it’s easy to lose track. The ranges below are hypothetical and are not quotes or market data; costs vary widely by region, home size, and condition, so replace them with real estimates from local providers.
| Item | Illustrative low | Illustrative high |
|---|---|---|
| Deep clean | $250 | $600 |
| Minor repairs (handyman) | $300 | $1,200 |
| Paint touch-ups | $200 | $900 |
| Yard cleanup | $150 | $500 |
| Photos and video | $0 | $400 |
| Document and association fees | $50 | $450 |
| Standard-level subtotal | $950 | $4,050 |
| Pre-listing inspection | $350 | $700 |
| Targeted repairs from inspection | $500 | $3,000 |
| Full-level total | $1,800 | $7,750 |
Association fees are one line where a state sets limits. Florida’s statute on condominium estoppel certificates, for instance, caps the standard fee at $250 when no amounts are owed, with a capped extra charge for faster delivery, per section 718.116(8); other states and associations differ.
Illustrative example (hypothetical numbers, not market data): A seller spends about $1,000 on cleaning, paint touch-ups, and a handyman visit, and orders a $450 inspection. The report finds a failing water heater valve, a $150 repair, and a loose deck railing that costs $200 to fix. She fixes both, keeps the invoices, and discloses the history. A buyer’s inspector later finds nothing new of note. Had she waited, a buyer might have requested a $2,000 credit for the same two items, plus a week of renegotiation. This does not mean every inspection pays for itself. It shows the logic: spend where the fix costs less than the objection.
The five paths below capture the range of choices, from documents only to selling as-is with full disclosure. Each trades effort and cost for different benefits, and none is right for everyone. The next graphic puts them side by side, and the text and tables above explain what each involves.
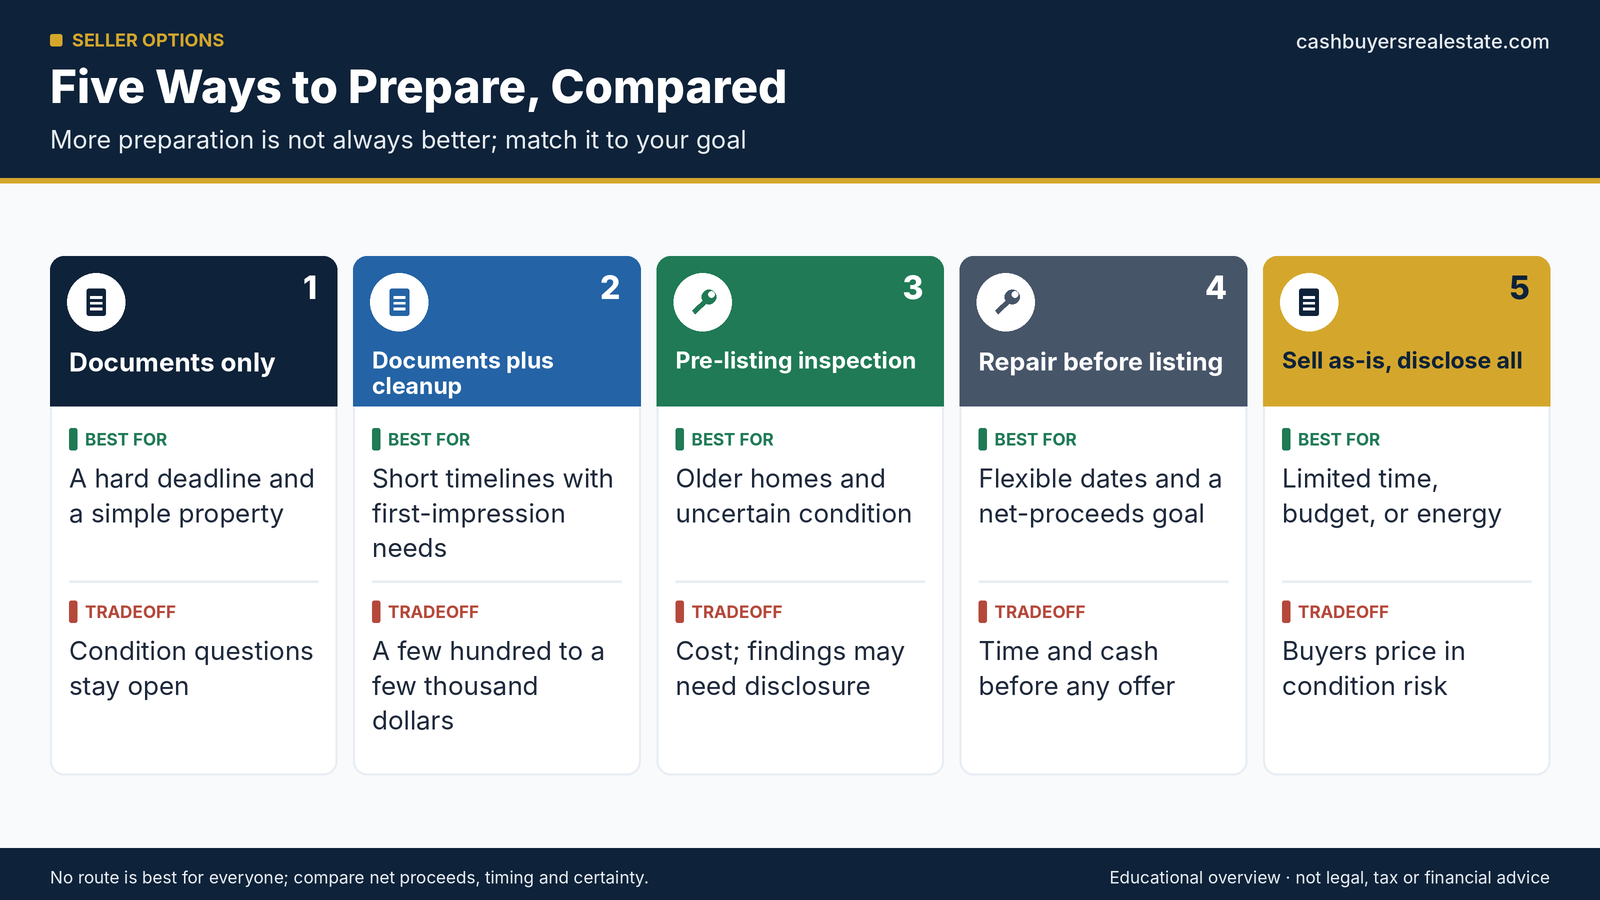
Text version of this infographic
- Documents only — best for: A hard deadline and a simple property; tradeoff: Condition questions stay open
- Documents plus cleanup — best for: Short timelines with first-impression needs; tradeoff: A few hundred to a few thousand dollars
- Pre-listing inspection — best for: Older homes and uncertain condition; tradeoff: Cost; findings may need disclosure
- Repair before listing — best for: Flexible dates and a net-proceeds goal; tradeoff: Time and cash before any offer
- Sell as-is, disclose all — best for: Limited time, budget, or energy; tradeoff: Buyers price in condition risk
Choosing a Route and a Closing Partner Before You Need One
By this point your packet is nearly ready, and the next question is where to send it. The most useful thing you can do before you ask for offers is decide how you’ll evaluate them. A list of questions written in calm conditions beats improvised ones in the middle of a negotiation.
Questions to ask before choosing a route
Questions about timing, price, and certainty
Every route involves a tradeoff among speed, price, certainty, and effort. The questions below help you see where a given offer or approach falls. Ask them of agents, buyers, and your own situation alike.
| Question | Why it matters | A useful answer looks like |
|---|---|---|
| What is my hard deadline, and what is only a preference? | Hard dates limit which routes qualify | A specific date and the cost of missing it |
| What will I net on each route after all costs? | Headline price hides fees and carrying costs | A line-by-line net sheet for each option |
| How likely is each route to close on time? | Fall-throughs cost weeks | Verified funds or approval, short contingencies |
| What repairs does each route expect from me? | Some buyers accept as-is, others do not | Written statement of condition assumptions |
| Who handles showings, marketing, and paperwork? | Your time has a value | Clear division of tasks |
| What happens if the deal falls through? | Fallback and deposit terms affect risk | Written termination and deposit terms |
If you can answer these for two or three routes, you’re ready to compare. If you cannot, the gaps tell you what to research next. The comparison of cash buyers and real estate agents and the head-to-head guide to cash sales versus listing provide frameworks.
Questions for cash buyers and investors
Cash buyers and investors can be a useful route, and some are straightforward to work with. Because cash sales often move quickly and skip some of the protections a lender’s process provides, the questions deserve extra care. Ask how the buyer is paying and whether proof of funds can be confirmed directly by the closing office. Ask who the buyer is: an individual or an entity, and who signs for it. Ask whether the contract can be assigned to another party, and if so, under what conditions.
Ask how the price was determined and under what circumstances it would change after a walkthrough. Ask how much earnest money will be deposited, who holds it, and what happens to it if the buyer cancels. Ask whether you can choose the closing office or attorney, or at least review the one proposed. Ask for the full contract in writing before you decide, and take time to read it.
When the written contract arrives, read it against a short checklist. Do the names of the parties and the legal description match your deed? Are the price, deposit amount, deposit holder, and closing date filled in? What is the inspection or due diligence period, and what rights does the buyer have to cancel during it? Does the contract allow assignment? Who pays which closing costs? What does it say about possession, personal property, and the condition of the home at closing? What are the default and termination terms for each side? Blank lines and phrases like “to be determined” are worth resolving before you sign, not after.
Be cautious about any buyer who asks for an upfront fee from you, pushes for a signature the same day with no chance for review, or is reluctant to put terms in writing. These behaviors do not prove bad intent on their own, but they are worth slowing down for. The scam prevention hub, the proof of funds guide, and how cash offers are calculated go further on verification and valuation.
Closing partner, attorney, and professional check-ins
Title company, escrow officer, or attorney: who closes in your state
Closing practice differs by state. In many states a title or escrow company handles the closing; in others an attorney does. Georgia is a clear example: its Supreme Court has held that real estate closings and deed preparation are the practice of law for licensed Georgia attorneys, as in In re UPL Advisory Opinion 2003-2. Never assume the process in your state matches what a friend described in another.
Choosing a closing partner in advance lets you start title work early and gives you a contact who knows your timeline. But the buyer may have a say. Federal law, in the Real Estate Settlement Procedures Act, bars a seller from requiring that a buyer purchase title insurance from a particular title company when the buyer is using a federally related mortgage loan, under 12 U.S.C. section 2608, so with a financed buyer you cannot make your preferred title company a condition of the sale. Local custom on who picks the title company differs widely, and in all-cash deals the contract sets the arrangement. Ask what applies to you.
Whatever the structure, you can still do two things: ask a closing office or attorney for a preliminary title search and an itemized estimate of your costs, and ask how they confirm wire instructions. The cash home sale process guide follows what happens at the closing office, step by step.
Tax and legal check-ins worth scheduling
Two short conversations are worth scheduling during the sprint. The first is with a real estate attorney, especially if you’re selling a home with a trust, estate, divorce, lien, or tenant issue, or if you want a contract reviewed on a tight timeline. Ask about disclosure duties in your state and anything unusual in your ownership history.
The second is with a tax professional. For a main home, federal law lets many sellers exclude up to $250,000 of gain, or up to $500,000 on a joint return, if they meet the ownership and use tests (generally two of the last five years); the sale must be reported on Schedule D and Form 8949 if you receive a Form 1099-S or any part of the gain is taxable, according to IRS Topic 701. Investment properties, inherited homes, and short ownership periods follow different rules, and state taxes vary.
Gathering tax-related records belongs in the packet. IRS Publication 523 notes that the settlement statement from your purchase lists the fees related to buying the home, which matters when your cost basis is calculated (IRS Publication 523). Receipts for improvements that are still part of the home and your closing statements help a tax professional work out your gain accurately. Ask what to keep and for how long.
Protecting Your Information and Spotting Problems While You Prepare
A readiness packet contains exactly the kind of information that identity thieves and payment fraudsters want: names, addresses, loan details, account numbers, and signatures. Preparing quickly is no reason to share it carelessly. A few habits cost nothing and protect you from the problems that turn a fast sale into a bad one.
Sharing your packet safely
What to share, with whom, and when
Not every document needs to go to every party at every stage. Early on, a buyer or an agent evaluating the property needs property facts, not your financial identity. A closing office needs ownership and payoff information, but only after a contract exists. The table below suggests a sensible order. It is a general guide, and your agent, attorney, or closing office may ask for more at particular steps.
| Packet item | Share before an offer? | Share after a contract? | Handling note |
|---|---|---|---|
| Property photos, general facts, disclosure form | Yes | Yes | No personal identifiers needed |
| Permits, repair records, warranties | If requested | Yes | Remove account numbers from invoices |
| Association documents | Often after a contract | Yes | Provided by the association or manager |
| Deed and tax bill | Not required | Yes | Public records, but parcel and owner details are still personal |
| Mortgage statement and payoff letter | No | To the closing office only | Redact account numbers when emailing to anyone else |
| Photo ID and signer details | No | To the closing office only | Use a secure upload or in-person delivery |
| Bank details for proceeds | No | Closing office, by a verified channel | Confirm by phone with a number you found yourself |
The overall rule is to give each party what it needs to do its job at that stage, and nothing more. Revisit the table if a request arrives that doesn’t fit.
Redaction, secure delivery, and verifying who is asking
Plain email is a poor container for sensitive data. If your closing office offers a secure portal or encrypted upload, use it. If you must email a document, remove or black out account numbers and other identifiers that the recipient does not need, and send full details by a more secure route. Keep your own devices updated and use strong, unique passwords on the email account tied to the sale.
Email accounts are the usual point of attack. The FBI’s public service announcement on business email compromise explains that criminals who gain access to a participant’s email can monitor the transaction, and that fraudulent requests often involve changing the payment type or redirecting funds to a different bank account; the agency recommends using secondary channels or two-factor authentication to verify requests for changes to account information (FBI IC3 PSA I-060923). The Consumer Financial Protection Bureau adds practical steps, including choosing trusted contacts early and never following wiring instructions contained in an email (CFPB).
Also verify the identity of anyone requesting documents. A person who says they represent a buyer, a lender, or a closing office should be reachable through contact information you can verify independently. A call to the office’s published number takes a minute. If something feels off, such as an urgent tone, a new email address mid-transaction, or a request that doesn’t fit the process, pause and confirm before sending anything.
What can go wrong while you prepare
Preparation mistakes that cost money
Most preparation errors are quiet. The most expensive is probably concealing or minimizing a known defect, whether by omitting it from a disclosure form, painting over it, or answering a buyer’s direct question with half the truth. Beyond the ethical problem, this invites legal claims after closing. Disclose what you know, as your state requires, and document repairs with invoices.
A second common mistake is assuming authority. Co-owners, heirs, and people holding a power of attorney may or may not be able to sign a deed, and a closing office will check. Finding out on closing week that a co-owner has to sign, or that a power of attorney is not accepted, can set a sale back by weeks. Confirm in the first two days.
A third is forgetting secondary liens. A home equity line of credit, an old second mortgage, or a lien from an unpaid contractor may not appear on your mortgage statement. A preliminary title search catches these. A fourth is spending money on upgrades that a buyer will not value, as the budget section noted. A fifth is relying on verbal promises, from a buyer, a contractor, or an association manager. If it matters, get it in writing and keep a copy.
Finally, don’t let preparation become an excuse to delay a decision. A packet is a tool, and at some point the useful step is to ask for offers. A week of preparation is plenty for most sellers.
Requests that should make you pause
Preparing to sell sometimes attracts solicitations that exploit urgency. Some are harmless marketing. Others are not. Slow down if someone asks you to pay an upfront fee before delivering any service you can verify, asks you to sign something the same day without time to read it, wants you to transfer the deed before you are paid, or tells you to keep the arrangement secret from your lender, family, or attorney. None of these automatically proves bad intent, but each is a reason to get independent advice first.
Compare any request that arrives against the process you expect. A real closing office, lender, or attorney follows a predictable sequence, and requests that skip steps deserve scrutiny. The scam prevention hub collects more patterns to watch for.
Keeping the Packet Current: Expiration Dates and Contingency Plans
A packet is not finished when you assemble it. Some of its contents go stale, and a few of the items you collected on day one may not be valid by closing. Knowing which documents expire, and what to do if preparation turns up a problem, keeps a good packet from becoming a misleading one.
Documents with shelf lives
Payoff statements, association certificates, and tax figures
A payoff statement states the amount needed to pay off the loan on a particular date, plus a daily interest figure for later dates. If closing slips past that date, the closing office needs an updated figure from your servicer. Plan to request an update within a few days of the expected closing, and remember that the servicer’s turnaround for a new written request can again run up to the regulatory maximum for most home loans, which is seven business days (12 CFR 1026.36(c)(3)). Closing offices often have faster informal channels, so ask them.
A practical way to stay ahead of expiring documents is to work backward from the expected closing date and write a refresh schedule. For instance:
- About two weeks before closing: confirm the payoff figure’s good-through date and ask whether an update will be needed.
- About ten days before closing: check the age of the association documents against your state’s validity rules.
- About a week before closing: ask the closing office to confirm tax proration figures and any assessments.
- Two to three days before closing: ask for the draft settlement statement and compare it with your contract.
- The day before closing: confirm the signing time, location or remote link, identification, and wire instructions by phone.
The timing is illustrative, since each deal moves differently, but the habit of counting backward from closing day turns a vague worry about expiration into a calendar you can follow.
Association documents carry their own expiration rules. In Florida, a condominium estoppel certificate delivered by hand or electronically is effective for 30 days and one sent by regular mail for 35 days. In Texas, the resale certificate must be prepared not earlier than 60 days before delivery, per the statutes cited earlier. If your closing date moves, ask whether the documents must be refreshed and how long that takes.
Tax figures also change. Prorated property taxes depend on the closing date, and unpaid amounts accumulate until paid. A bill you collected in week one may not reflect a later installment or a corrected assessment. Ask the closing office to confirm current amounts before the settlement statement is finalized.
Insurance, utilities, photographs, and condition records
Insurance deserves an update if the house will be empty. Policies often treat vacancy differently, and the terms vary, so confirm with your insurer what happens when you move out and how long coverage remains in force after closing. Keep coverage until the sale funds and the deed is recorded, and don’t cancel a policy until the closing office confirms.
Utilities should stay on through closing. Schedule final meter readings for the closing date, and keep account details in the packet in case the buyer or closing office needs them. Heat and water in cold climates protect the house from damage that can lead to a dispute at the final walkthrough.
Photographs and condition records age, too. If weeks pass between your photos and closing, take new ones on the day you move out. They document the condition you left, protect you from later claims, and give you a reference if a buyer says something changed. If you made repairs after the disclosure form was completed, update the form or add an addendum as your state requires, and tell the buyer’s side in writing.
When preparation reveals a problem or the sale stalls
Reusing the packet across routes
One advantage of a readiness packet is that it works for any route. An agent listing, a cash sale, a sale by owner, and an auction all need to know who owns the house, what is owed, what the house is like, and how to reach you. If you start with one route and switch, you do not start over.
Illustrative example (hypothetical numbers, not market data): Two sellers with similar homes accept offers on the same day. Seller A sent her payoff request, association request, and title search request the week before listing. Seller B starts all three after signing. If each of those has a response time of about seven business days and the requests run in parallel, Seller B loses roughly a week and a half of calendar time that Seller A already spent while she was cleaning, taking photos, and talking to buyers. The sale itself is no different. Only the order of operations changed.
Keep a simple version history of the packet: a dated list of what was added or updated and when. If the sale moves to another party, such as a second buyer after a fall-through, the history shows exactly what was shared and what has changed. The diagnostic guide on stalled sales explains how to decide when to switch routes.
What to do if the sprint uncovers a title, authority, or condition problem
Sometimes the sprint turns up something unwelcome: an unexpected lien, a co-owner who cannot be found, an unpermitted addition, or a problem with the roof. The good news is that you found it early. The sequence that usually works is to stop and write down what you know, identify who controls the fix, get professional advice on the options, and then decide whether to resolve the issue, adjust the price, or change routes.
For liens and title clouds, a title company or attorney can explain the path and rough timing; the title problems hub and liens guide go through typical fixes. For authority issues in probate or an estate, an attorney is the right first call, and the probate guide explains the court-process view. For condition problems, compare repair, credit, and as-is scenarios on net proceeds before you spend.
If a deadline of any kind is closing in, such as a foreclosure sale date or a court hearing, treat it as time-critical and speak with a qualified professional promptly. The foreclosure guide describes the official sources to check. Careful preparation can feel slow when you are anxious, but it usually costs less than a rushed decision made without full information.
The last graphic collects six checks that guard the most expensive mistakes in sale preparation: signers, payoff, liens and title, disclosures, association documents, and the safety of your information and money. The details are all in the text above, and the checklist is meant to be printed and kept with your packet.
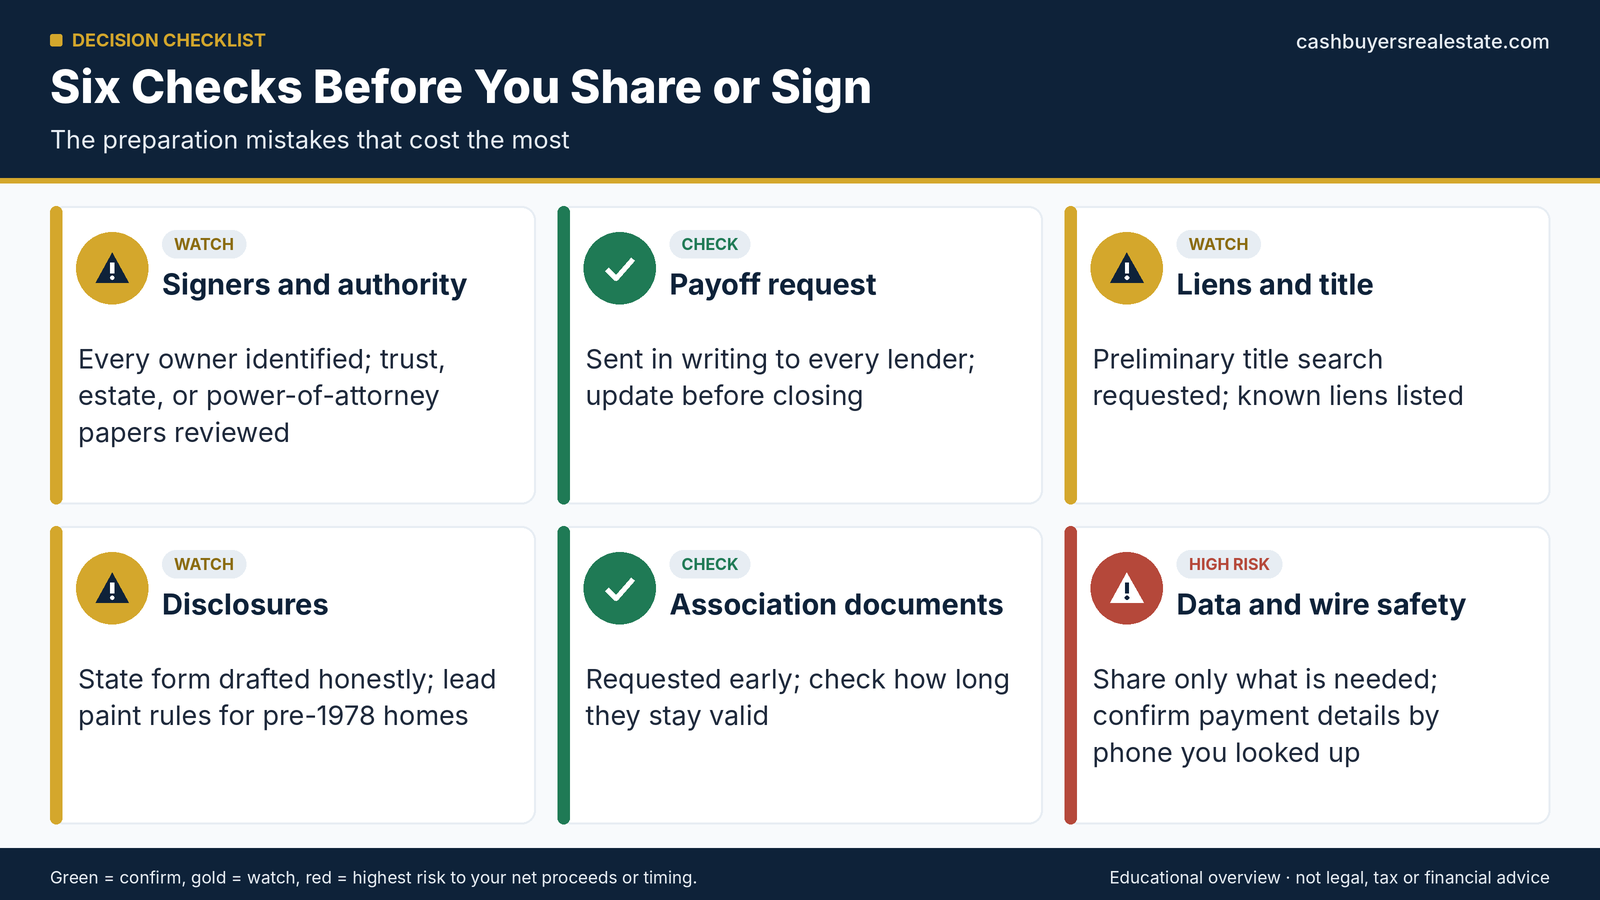
Text version of this infographic
- Signers and authority — Every owner identified; trust, estate, or power-of-attorney papers reviewed
- Payoff request — Sent in writing to every lender; update before closing
- Liens and title — Preliminary title search requested; known liens listed
- Disclosures — State form drafted honestly; lead paint rules for pre-1978 homes
- Association documents — Requested early; check how long they stay valid
- Data and wire safety — Share only what is needed; confirm payment details by phone you looked up
Frequently Asked Questions About Preparing for a Fast Home Sale
The readiness packet and your timeline
Questions about the packet itself
- What is the single most important document to have ready?
The deed, along with proof of who can sign for it. Nothing can close until ownership and authority are clear. After that, the written mortgage payoff request is the item most likely to hold up a closing, because the servicer controls how quickly it responds. If title is held by a trust, an estate, or an entity, proof of the signer’s authority belongs in the same top tier.
- Do I need all of these documents before I contact a buyer?
No. Property facts and photos are enough to start a conversation. Ownership, payoff, and identification documents are typically needed by the closing office once a contract exists. Having them ready simply means you won’t be the slow part of the transaction, and it lets you move quickly if a strong offer arrives sooner than you expected. Share sensitive items only when and with whom they are needed.
- Where do I get a copy of my deed if I cannot find mine?
Contact the county office that records deeds, which may be called the recorder, register of deeds, or clerk, depending on the state. Many offices offer online search or copies by request, and fees vary. Your title company or attorney can also retrieve one.
- Should I put everything in paper or digital form?
Both are fine, but digital copies are easier to share quickly. Scan or photograph each document and name the files clearly. Keep originals of signed documents in a safe place, and send sensitive files only through secure channels.
Questions about timing and deadlines
- How long does it take to prepare a house for a fast sale?
A basic packet can be assembled in a day or two, and a standard preparation, including cleanup and disclosure drafting, often takes about a week. Items that depend on others, such as payoff statements and association documents, can take longer, so request them first.
- How long can a mortgage servicer take to send a payoff statement?
For most home loans, federal regulation requires an accurate payoff statement within a reasonable time and no more than seven business days after a written request, with longer periods allowed in some situations such as bankruptcy or foreclosure. Send the request as early as possible.
- How long do HOA documents take?
It depends on state law and the association. Florida requires a condominium association to issue an estoppel certificate within 10 business days of a request, and Texas requires a property owners’ association to deliver the required information no later than the 10th business day. Other states differ.
- What if I only have a few days?
Do the minimal tier: deed, authority, payoff request, tax bill, and access details. Ask a closing office to start a preliminary title search. Be upfront with buyers about what is and isn’t ready, and consider guidance from the 14-day sale guide on what a short schedule can realistically hold.
Repairs, costs, and choices
Questions about repairs, inspections, and costs
- Do I have to fix everything before selling?
No. Many buyers accept homes as they are and adjust their offers. You still have to follow your state’s disclosure rules for known defects, and as-is does not erase them. Focus on inexpensive fixes and safety issues, and decide on larger items by comparing net proceeds.
- Is a pre-listing inspection worth it?
Sometimes. It can prevent surprises and support accurate disclosure, especially for older homes. But buyers often order their own inspections, the report may reveal issues you must disclose, and it costs time and money. Weigh it against how much uncertainty you have about the home’s condition.
- How much should I budget for preparation?
It varies widely by region and condition. For many homes a standard preparation involves cleaning, minor repairs, touch-up paint, yard work, and document fees. Get local quotes, and decide in advance what you will not spend on, such as major renovations. A useful test for each line item is whether it removes a specific obstacle for less than a buyer would deduct for it.
- Who pays for the title search and closing fees?
That depends on state law, local custom, and the contract. Some of these costs are customarily paid by the seller and some by the buyer. Ask your closing office for an itemized estimate of your side, and see the guide to closing costs in a fast sale.
Questions about routes, safety, and taxes
- Should I choose my closing company before I have a buyer?
It can help, because you can start title work early. But the buyer may have a say, and practice varies by state. Where a buyer uses a federally related mortgage loan, federal law prevents a seller from requiring a particular title insurer. Ask what applies in your state.
- How do I protect my information when sharing documents?
Share only what each party needs at each stage, use a secure portal when available, and redact account numbers from documents you email. Verify the identity of anyone requesting documents by contacting them through a number you find independently.
- What do I do if someone sends changed wiring instructions?
Stop and call the closing office at a number you found yourself. The FBI and the Consumer Financial Protection Bureau both advise verifying changes through a separate channel and never following wiring instructions in an email. If money has already moved, contact your bank immediately and report it at ic3.gov.
- Will selling my home create a tax bill?
It depends on your gain, how long you owned and lived in the home, and your state. Many homeowners can exclude part or all of the gain on a main home under federal rules, but rentals and inherited homes differ. A tax professional can estimate your result before you sign. If you receive a Form 1099-S, the sale generally must be reported even when the gain is fully excludable, per IRS guidance.
Deciding How Much to Prepare and What to Do Next
You now have the pieces: a packet, a sprint, a budget, a set of questions, and a list of things to protect. The remaining step is deciding how far to go and when to stop, then moving to the next phase without second-guessing.
Match your preparation to your priority
A decision framework: preparation level by deadline and goal
The right amount of preparation depends on what you’re trying to protect. If your priority is a date, prepare the paperwork and skip the polish. If your priority is the strongest net, spend more time on condition and presentation. If your priority is certainty, spend on verification: title, funds, and contract terms. The table below pairs common priorities with a reasonable preparation focus.
| If your top priority is… | Prepare most on… | Safe to skip… | Watch out for… |
|---|---|---|---|
| A firm date in a few weeks | Ownership, payoff request, title search, access | Upgrades, elaborate staging | Third-party delays you can’t speed up |
| The strongest net proceeds | Pricing evidence, condition, presentation, inspection | Nothing in the packet | Over-spending on improvements |
| Certainty of closing | Verifying buyer funds, title, and contract terms | Cosmetic work | Choosing speed over a verified buyer |
| Minimal effort | Core documents and a clear as-is disclosure | Repairs and staging | A lower price for the convenience |
| Keeping options open | Full packet and a fallback route | Committing early | Letting preparation become delay |
Read the table as a starting point. If two rows both apply, prepare for both and decide after you see real offers.
Illustrative example (hypothetical numbers, not market data): A homeowner has 10 days before she moves for work and owns a clean-title house with one mortgage. Her priority is a firm closing date, and she has a modest budget. She chooses the minimal-plus tier: the deed, a payoff request on day one, a title search request on day two, a disclosure draft by day four, and a $400 cleaning and handyman visit on day five. She skips repairs, collects offers from two sources, and decides on day seven based on net proceeds and proof of funds. She cannot control what the county recorder or the buyer does, but she has removed every delay that belonged to her.
When priorities conflict, which they often do, rank them. Most sellers can name a date they cannot miss, an amount they cannot go below, and a task they cannot do themselves. Write those three things on the front of your folder. They turn a vague wish to “sell quickly and well” into criteria you can use to compare offers and to decide which preparation items to skip. If the only way to hit your date requires a net you cannot accept, you have learned that early enough to look at alternatives, including a longer plan, a rent-back, or a bridge arrangement.
Misconceptions that lead sellers astray
Several beliefs about preparation sound sensible and cost people time or money. One is that preparation means renovation. In fact, the most valuable preparation is usually documents, decisions, and inexpensive cleanup, not new finishes. Another is that cash buyers don’t need paperwork. A cash buyer still needs a clear title, a payoff, and a signed deed, and a closing office will ask for the same documents.
A third is that a pre-listing inspection protects you from renegotiation. It helps, but buyers often order their own, and a report you commissioned can create disclosure duties. A fourth is that selling as-is means no disclosure. Disclosure rules are set by state, and as-is language does not remove them. A fifth is that you can organize later, after you have an offer. Offers arrive with deadlines attached, and documents with built-in waits cannot be rushed by wanting them sooner.
The last misconception is the quietest: that being prepared commits you to a route. It doesn’t. A complete packet works equally well for a listing, a cash sale, or a sale by owner, and it makes comparing them easier. The comparison of cash buyers and agents and the overview of urgent sale options help you choose.
What to do next
Your first 48 hours
If you’re ready to start, the next two days are about the tasks with waiting periods and the questions that determine everything else. Work through these in order:
- Find your deed or request a copy from the county office that records deeds.
- List every owner and signer, and note anyone whose authority needs documents.
- Send a written payoff request to each lender and keep a dated copy.
- Request your property tax bill and, if applicable, the association’s documents.
- Call a closing office or real estate attorney about a preliminary title search and timeline.
- Draft your disclosure form and gather permits, warranties, and repair records.
- Write down your hard deadline, your soft deadline, and your top priority.
If you want the full sequence that follows preparation, the step-by-step playbook picks up where this guide leaves off, and the process guide traces what happens at the closing office. If your timeline is very short, the guides to a 30-day plan and a 14-day plan show how much of this to compress.
Two small habits make the first 48 hours more effective. First, create the folder structure on day one, with sections for ownership, money, property facts, and logistics, even while most of it is empty; an empty section is a to-do list. Second, keep a running log of every request you send, with the date, the recipient, and the response. When a payoff statement or association package takes longer than expected, the log shows whether the delay is yours or theirs and gives you something specific to cite when you follow up.
What to bring to a first conversation
A first conversation with an agent, attorney, or closing office is more productive with a few items in hand. Bring or send a copy of the deed, the latest mortgage statement or payoff letter once you have it, the property tax bill, a list of owners and their contact details, and any association information. Bring your draft disclosure and a list of known repairs, with dates and invoices if you have them. Bring your timeline: the date you must be out, the date you would like to be paid, and what you can and can’t flex on.
Then bring questions. Ask what the process looks like in your state, who closes transactions there, what fees to expect on your side, how long each step typically takes, and how the office confirms wire instructions. Ask what could surprise you, given your particular facts, and write the answers down. A professional who answers clearly and in plain language is a good sign. One who is vague or rushes you is worth a second opinion. For state-specific context, the local pages can help.